
Main Courses
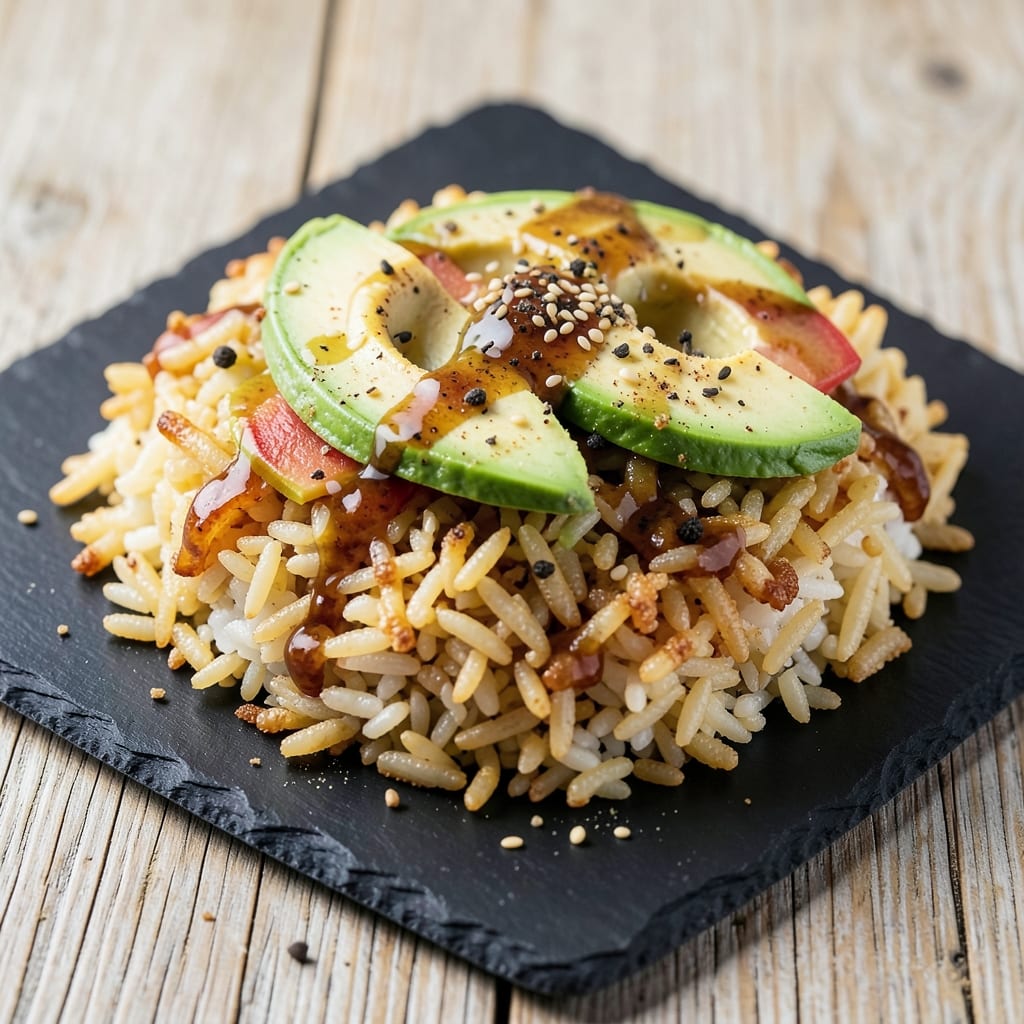
This air fry rice recipe transforms ordinary rice into a dish with crispy edges and a perfectly fluffy core—no deep-frying required. The secret lies in pre-cooking the rice just right, then air-frying it in batches to achieve that coveted texture without losing moisture. I developed this method after struggling to replicate restaurant-style fried rice at home, and the results are consistently impressive.
The process starts with day-old rice (or freshly cooked and cooled) that absorbs seasonings better and fries up crispier. You’ll toss it with a simple mix of oil, soy sauce, and garlic powder before air-frying at 375°F for 5-7 minutes, shaking the basket halfway for even browning. This technique ensures every grain gets that satisfying crunch while staying tender inside.
What makes this recipe truly versatile is how easily it adapts to your preferences. Add scrambled eggs and veggies for a classic version, swap in shrimp or chicken for protein, or keep it vegetarian with mushrooms and bell peppers. The air fryer’s precision heat keeps flavors balanced, so you won’t overcook any additions.
Serve it as a main dish with a fried egg on top, or use it as a flavorful side to complement grilled meats or roasted vegetables. The crispy edges and aromatic seasoning make it a standout dish that’s perfect for weeknight dinners or meal prep. Let’s get started!
Ingredients for air fry rice
Transform ordinary rice into crispy-edged perfection with these core ingredients and optional additions.
| Ingredient | Amount | Notes |
|---|---|---|
| Day-Old Cooked White Rice 🍚 | 4 cups | Cold or room temperature preferred |
| Avocado Oil 🫒 | 2 tbsp | High smoke point preferred |
| Soy Sauce 🍶 | 2 tbsp | Low-sodium preferred |
| Garlic Powder 🧄 | 1 tsp | Freshly ground for best flavor |
| Ground Black Pepper 🌶️ | ½ tsp | Freshly cracked preferred |
| Sesame Oil 🫒 | 1 tsp | Toasted sesame flavor preferred |
| Green Onions 🧅 | 3 whole | Thinly sliced for garnish |
| Scrambled Eggs 🍳 | 2 whole | Optional protein addition |
| Frozen Mixed Vegetables 🥕 | 1 cup | Peas, carrots, corn preferred |
| Optional Protein Additions 🍗 | ½ lb | Chicken or shrimp, diced |
| Optional Vegetable Additions 🌶️ | 1 cup | Bell peppers, mushrooms, or snap peas |
The rice is non-negotiable—day-old works best for crispiness, but freshly cooked rice cooled for 30 minutes also works. Jasmine or basmati rice holds up better to air frying than long-grain white. For the oil, avocado oil has the highest smoke point and neutral flavor, but any high-quality neutral oil works. Soy sauce should be low-sodium to control seasoning intensity—you can always add more salt at the end. The garlic powder is key for that aromatic depth, but if you're feeling fancy, minced fresh garlic (1 tsp) adds another layer of flavor. Store-bought frozen mixed vegetables are a game-changer for convenience, but fresh veggies work just as well if you're prepping ahead.
No eggs? Tofu cubes or chickpeas make great protein swaps—they absorb the seasonings beautifully. Running out of mixed veggies? Frozen peas alone or sautéed mushrooms work perfectly. For protein, shrimp or diced chicken breast are ideal—they cook quickly and won't overpower the dish. If you're using fresh veggies, bell peppers and snap peas are the most flavorful choices. Pro tip: Pat any added proteins or veggies dry with a paper towel before tossing with the rice—this ensures they crisp up nicely in the air fryer. The sesame oil should be added at the very end for that signature aroma, not during cooking.
Rice can be prepped a day ahead and stored in an airtight container in the fridge for up to 3 days. The optional protein and veggie additions should be added fresh just before air frying. Once cooked, this dish reheats beautifully—simply toss with a splash of water or soy sauce and air fry at 350°F for 3-4 minutes. For meal prep, portion into airtight containers with a paper towel on top to keep it crispy. The crispy edges soften slightly when reheated, so plan to air fry for an extra minute if you want that texture back.
Why You'll Love This Recipe
- No Chopping Needed: I swear by this trick—just toss in day-old rice, a splash of soy sauce, and a shake of garlic powder. The air fryer does all the work while I’m still deciding what to watch on TV.
- Crispy Without Fuss: That avocado oil? It’s the secret to golden, slightly crispy edges on every grain—no flipping or frying required. Honestly, it’s the kind of texture that makes you pause mid-bite.
- Lunchbox Magic: Between us, this is my go-to for packed lunches or last-minute dinner guests. Cold rice? Perfect. Reheated? Even better. The soy sauce keeps it flavorful even after sitting for hours.
- Pantry Staple Power: Three ingredients (plus rice) and you’ve got a meal. I’ve fed a crowd with this, used it to stretch leftovers into a new dish, and never once regretted the simplicity. Budget-friendly? Absolutely. Reliable? Always.
Step-by-step instructions for air fry rice with crispy edges
Transform your day-old rice into restaurant-quality air-fried perfection with this foolproof technique.
Prepare the Rice Base with Perfect Texture
Spread the 4 cups day-old cooked white rice evenly on a baking sheet and let it sit at room temperature for 10 minutes. This step is crucial—cold rice creates steam that prevents crispy edges. You want the rice to be completely dry on the surface, with just enough moisture inside to maintain its fluffy core.
While the rice warms, thoroughly mix the 2 tbsp soy sauce, 1 tsp garlic powder, and 0.5 tsp ground black pepper in a small bowl. The soy sauce adds depth of flavor while the garlic and pepper create a balanced seasoning profile. I like to use freshly ground pepper for that bright, crackly bite that stands up to the crispy texture we're creating.
Season and Preheat the Air Fryer
Transfer the warmed rice to a large mixing bowl and gently fold in the soy sauce mixture until every grain is evenly coated. Be careful not to mash the rice—you want to preserve those individual grains that will become crispy on the outside while staying tender inside. Add the 1 cup frozen mixed vegetables and any 1 cup optional vegetable additions (like bell peppers or mushrooms) and toss lightly to distribute.
Preheat your air fryer to 375°F for 3 minutes. This high temperature is key to creating that signature crispy texture. While it preheats, lightly spray the air fryer basket with avocado oil—just a fine mist to prevent sticking. The avocado oil's high smoke point ensures we get proper browning without burning.
Cook in Batches for Even Crispiness
Working in batches if needed, carefully transfer the rice mixture to the air fryer basket in an even single layer. Press down gently but firmly—this creates better contact with the hot air and ensures even browning. Cook for 6-8 minutes, shaking the basket every 2 minutes to prevent sticking and promote even crisping.
You'll know it's ready when the edges are deep golden brown and the rice has a slightly caramelized appearance. The internal temperature should reach 165°F at the center. If using 0.5 lb optional protein additions like chicken or shrimp, add them during the last 2 minutes of cooking to ensure they're heated through without overcooking.
Finish with Eggs and Sesame Oil
While the rice cooks its final batch, prepare the 2 whole scrambled eggs in a separate pan over low heat. Scramble until just set—soft curds that will melt slightly when combined with the hot rice. Keep them warm but not fully cooked.
Once all rice is crispy, transfer it to a serving platter. Drizzle with 1 tsp sesame oil and toss gently to coat. The sesame oil adds a nutty aroma and helps bind everything together. Top with the scrambled eggs and 3 whole green onions, thinly sliced. The green onions add freshness that cuts through the richness of the crispy rice.
Serve Immediately for Maximum Crisp
Serve the air fry rice immediately while it's at its crispest. The texture will soften slightly as it cools, but the edges should remain satisfyingly crunchy. For best results, serve family-style in the center of the table so everyone can help themselves to the crispy bits.
This technique works equally well with any protein addition—try diced chicken for a classic version or shrimp for a lighter option. The key to success lies in the proper preheating, even layering, and frequent shaking during cooking. Don't skip the room-temperature step; cold rice will steam instead of crisp.
Pro Tips For Making Air Fry Rice
- CRISP THE RICE FIRST: Spread your day-old rice in a single layer on a baking sheet and air fry at 350°F (175°C) for 5-7 minutes before adding any other ingredients. This step dries out excess moisture so your rice doesn’t turn mushy when you add the soy sauce—trust me, I learned this after making a soggy mess the first time.
- USE WET SOY SAUCE: Mix 1 tablespoon of soy sauce with 1 teaspoon of water before drizzling it over the rice. The water helps distribute the sauce evenly and prevents clumping—no more dry patches or gloppy rice. (Yes, it sounds counterintuitive, but it works every time.)
- DON’T OVERLOAD THE BASKET: Split your rice into two batches if needed—air fryers need airflow to crisp things properly. I’ve seen people shove in too much and end up with steam instead of crunch. A lightly packed basket guarantees even cooking and that satisfying texture.
- SALT THE RICE AFTER AIR FRYING: Sprinkle a pinch of garlic powder and black pepper right after the rice comes out of the air fryer, then toss it while still hot. This locks in the flavors instead of letting them dissipate. (I used to add it earlier and always wondered why the seasoning tasted muted.)
Dietary considerations for this recipe
Vegetarian Adaptations
This air fry rice recipe becomes a protein-packed vegetarian powerhouse with simple swaps. Replace eggs with ½ cup crumbled tofu or ½ cup chickpeas—both absorb the soy sauce beautifully and add satisfying texture. For extra heartiness, stir in ½ cup edamame or ¼ cup shelled pistachios during the final toss. These additions bring plant-based protein while keeping the dish light and crispy. 🌱
Gluten-Free Options
For gluten-free versions, swap regular soy sauce for tamari or coconut aminos—both provide the same umami depth without gluten. Check your frozen veggie mix for gluten-containing additives, and opt for certified gluten-free brands like Green Giant or Birds Eye. The air fryer's gentle heat ensures these ingredients crisp without burning, making it a safe bet for gluten-sensitive diners.
Low-Carb Swaps
Transform this into a low-carb meal by replacing rice with cauliflower rice or shirataki rice noodles. Pre-cook the cauliflower rice until tender, then follow the same air-frying technique. For extra crunch, add ½ cup crushed pork rinds or ½ cup almond flour to the seasoning mix. These swaps cut carbs dramatically while maintaining the crispy texture that makes this dish so satisfying.
Allergen-Friendly Adjustments
For nut allergies, skip sesame oil and use toasted coconut oil instead—it adds a similar aromatic finish without nuts. If you're avoiding eggs entirely, the dish still holds together with the rice's natural starch and the soy sauce acting as a binder. For soy allergies, substitute with coconut aminos or homemade fish sauce** (if not vegetarian) for that umami kick.
Meal Prep Considerations
This recipe preps beautifully for dietary restrictions when stored properly. Keep components separate: store rice and veggies in one airtight container, proteins in another, and sauces in small jars. When ready to eat, simply toss everything together and air fry at 350°F for 3-4 minutes. This method maintains texture while accommodating last-minute dietary needs—whether gluten-free, low-carb, or nut-free. 💡
Nutrition facts
Frequently asked questions
Why does day-old rice work better than freshly cooked rice?
Day-old rice has less surface moisture, which prevents steaming during air frying and creates those perfect crispy edges. Fresh rice contains too much moisture that turns to steam, making it difficult to achieve the desired texture. If you only have fresh rice, spread it on a tray and let it sit uncovered for 30 minutes to dry out before seasoning.
Can I make this recipe with brown rice or other varieties?
While this recipe works best with white rice (especially jasmine or basmati), you can try brown rice—but expect longer air-frying times (8-10 minutes) and slightly less crispiness due to its higher moisture content. For best results with brown rice, pre-cook it until very dry and consider reducing the soy sauce by 1 teaspoon to prevent over-seasoning.
How do I keep the rice crispy when reheating leftovers?
Reheat leftovers by tossing with 1 teaspoon soy sauce and ½ teaspoon sesame oil, then air fry at 350°F for 3-4 minutes until heated through. The key is to add a tiny bit of moisture (like a splash of water) and crisp it up quickly—this restores the crunch without making it soggy. Store in an airtight container with a paper towel on top to absorb excess moisture.
What's the best way to add protein without overcooking it?
Add proteins like shrimp or chicken during the last 2 minutes of air frying to ensure they cook through without drying out. For extra insurance, pre-cook proteins separately (like poaching shrimp) and add them just before serving. If using tofu, press it first to remove excess water and toss with the rice in the final 3 minutes of cooking for a crispy exterior.
Can I use this technique for other grains like quinoa or couscous?
While the texture will differ slightly, you can air fry quinoa or couscous using the same method—just reduce cooking time to 4-5 minutes at 375°F and shake the basket more frequently. For quinoa, which holds more moisture, spread it in an even thinner layer. The principle of high heat and frequent shaking applies to any grain you want to crisp up.