
Main Courses
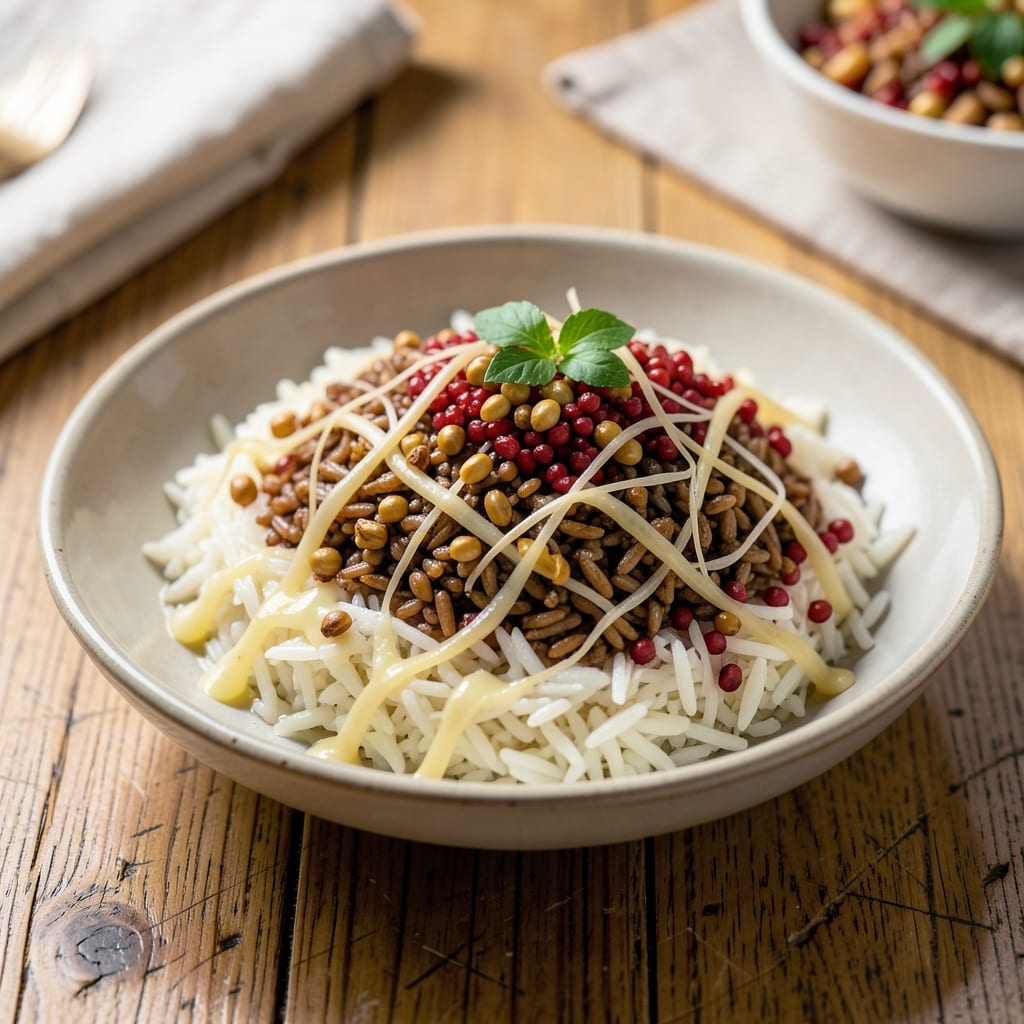
This 5-grain rice recipe transforms ordinary rice into a nutty, toasted masterpiece with silky texture and satisfying crunch—perfect for elevating any meal. 🌟 The secret lies in toasting whole grains before cooking, which unlocks deeper flavors and prevents mushiness. Whether you're serving it as a side, building grain bowls, or pairing it with proteins, this versatile blend delivers restaurant-quality texture at home.
What sets this recipe apart is the balanced combination of basmati, brown rice, barley, quinoa, and millet—each grain contributes unique texture and nutrition. The grains are toasted in butter (or oil for vegan versions) until fragrant, then simmered in broth for rich, aromatic depth. No fancy equipment needed; a simple stovetop method ensures foolproof results every time.
By the end, you'll have golden, toasted grains with crisp edges and tender centers, infused with savory notes from garlic and herbs. The nutty aroma alone makes this dish irresistible, while its adaptability lets you customize it for salads, stir-fries, or as a hearty main. This isn't just rice—it's a flavor and texture upgrade for your entire meal.
Ready in 30 minutes with minimal hands-on time, this recipe is ideal for weeknight dinners or meal prep. The grains stay fresh for days, making it perfect for batch cooking. Serve with roasted vegetables, grilled proteins, or as a standalone dish with a drizzle of olive oil and fresh herbs. Let's get cooking!
Ingredients for 5 grain rice
Five grains toasted in butter, simmered in broth—where nutty crunch meets silky perfection.
| Ingredient | Amount | Notes |
|---|---|---|
| Basmati Rice 🌾 | 1 cup | Long-grain, uncooked |
| Brown Rice 🌾 | ¾ cup | Uncooked, medium-grain |
| Barley 🌾 | ½ cup | Pearled, uncooked |
| Quinoa 🌾 | ½ cup | Rinsed, uncooked |
| Millet 🌾 | ½ cup | Uncooked, fine grain |
| Unsalted Butter 🧈 | 4 tbsp | Cold, cubed for toasting |
| Garlic Cloves 🧄 | 3 cloves | Minced, fresh preferred |
| Low-Sodium Chicken Broth 💧 | 3 cups | Homemade or high-quality |
| Fresh Thyme Leaves 🌿 | 1 tbsp | Chopped, or 1 tsp dried |
| Fresh Parsley Leaves 🌿 | 1 tbsp | Chopped, for garnish |
| Diamond Crystal Kosher Salt 🧂 | ¾ tsp | Adjust to taste |
| Black Peppercorns 🌶️ | ½ tsp | Freshly cracked |
| Extra-Virgin Olive Oil 🫒 | 2 tbsp | For finishing drizzle |
The grains are the heart of this recipe, so source them fresh. Whole Foods or specialty stores carry the best-quality basmati and quinoa—look for vibrant color and no signs of aging. Barley and millet should be pearled but still retain their natural shape. For the broth, homemade is ideal, but Pacific Foods or Imagine brands deliver restaurant-quality flavor. Toasting the grains in butter (or avocado oil for vegan) until nutty and fragrant unlocks their full potential—don’t rush this step, as it builds the foundation for texture and depth. The garlic should be fresh, with no green shoots or soft spots, and the herbs should be bright green, not wilted.
No butter? Avocado oil or coconut oil work beautifully for toasting—just reduce the amount slightly to avoid excess fat. Substitute low-sodium broth with vegetable broth if needed, though chicken broth adds a subtle savory note. For the grains, swap millet for farro if unavailable, but keep the ratio balanced to maintain texture contrast. Fresh herbs are ideal, but dried thyme and parsley (at half the amount) work in a pinch. If you’re prepping ahead, toast the grains and store them in an airtight container until ready to cook—they’ll keep their aroma for up to 3 days.
This grain blend reheats beautifully—simply add a splash of water or broth and cover until warmed through. Store cooked grains in the fridge for 4-5 days in an airtight container, or freeze for up to 3 months for meal prep convenience. For extra crunch, toast the grains again in a dry skillet for 2-3 minutes before serving. Garnish with fresh parsley and a drizzle of extra-virgin olive oil just before eating to preserve freshness. The grains pair exceptionally well with roasted vegetables, grilled proteins, or as a standalone dish with a sprinkle of freshly cracked black pepper.
Why You'll Love This Recipe
- One-Pot Wonder: I swear by this—just toss all five grains into one pot with broth, let it simmer, and walk away. No measuring cups, no separate timers, no stress. The barley softens first, then the millet plumps up while the basmati stays fluffy. It’s the kind of meal that makes me question why I ever cooked rice separately.
- Nutty, Toasty Magic: Between us, this blend is ridiculously good—earthy from the millet, slightly sweet from the brown rice, with that floral basmati finish. I’ll be real: the first time I tasted it, I thought, "Why didn’t I do this sooner?" Toast the grains first (just 2 minutes in the pot), and you’ll get that deep, caramelized flavor that turns side dishes into the star.
- Meal Prep MVP: This keeps for ages—I’ve had it for five days straight, and it still tastes fresh. Pack it for lunches, use it as a base for stir-fries, or serve it cold in bowls with roasted veggies. Honestly, I make a big batch every Sunday because it’s the only grain I don’t dread eating by Wednesday. (Yes, even on a Tuesday night.)
- Budget-Boosting Power: Quinoa and millet might sound fancy, but they’re cheaper than you think—and this recipe stretches them further by mixing them with rice and barley. I feed four people for under $5, and no one complains. It’s my go-to when groceries are tight, but somehow, it still feels like a treat. (My kids don’t even notice the barley’s there.)
Step-by-step instructions for 5-Grain rice with toasted crunch
This method transforms simple grains into a restaurant-worthy blend with perfect texture contrast.
🔥 Step 1: Toast the Grains for Maximum Flavor
Heat a large skillet over medium-high heat and add the 4 tablespoons unsalted butter. Once the butter foams but hasn't browned, add all five grains: 1 cup basmati rice, ¾ cup brown rice, ½ cup barley, ½ cup quinoa, and ½ cup millet. Stir constantly for 5-7 minutes until the grains develop a nutty aroma and begin to turn golden.
Here's the thing—this toasting step is non-negotiable. It develops the grains' natural oils and creates that irresistible toasted crunch. Watch closely: the millet and quinoa will toast fastest, so keep stirring to prevent burning. When you see the basmati rice turning translucent at the edges, it's time to move to the next step.
🍳 Step 2: Sauté Aromatics for Depth of Flavor
Add the 3 minced garlic cloves and 1 tablespoon chopped fresh thyme leaves to the toasted grains. Stir for 30 seconds until the garlic becomes fragrant but doesn't brown. This quick sauté infuses the grains with aromatic complexity without overpowering their natural flavors.
Real talk: don't skip this step. The garlic and thyme will dissolve into the grains during cooking, creating layers of flavor you won't get from just seasoning after. If you're using dried thyme, add it now with the garlic—just remember it's more concentrated, so start with half the amount.
🥘 Step 3: Cook with Broth for Perfect Texture
Pour in the 3 cups low-sodium chicken broth and bring to a gentle boil. Once boiling, reduce heat to low and cover with a tight-fitting lid. Let it simmer for 20 minutes without disturbing it. This initial cooking allows the grains to absorb the initial liquid and begin gelatinizing.
Don't peek! Every time you lift the lid, you release steam and add 5-10 minutes to your cook time. After 20 minutes, check the grains. They should have absorbed most of the liquid but still have a slight bite. If they're too dry, add ¼ cup water; if they're too wet, uncover and simmer uncovered for 5 minutes to evaporate excess moisture.
⏰ Step 4: Rest and Finish with Olive Oil
Remove the skillet from heat and let the grains rest, covered, for 10 minutes. This resting period allows the grains to fully hydrate and develop their final texture. After resting, fluff the grains gently with a fork, then drizzle with 2 tablespoons extra-virgin olive oil and toss lightly to distribute.
The olive oil at this stage serves two purposes: it adds richness and helps create that signature "finished" look. The grains should now have a beautiful contrast—crispy edges from the initial toasting and tender centers from the slow cooking. Season with ¾ teaspoon kosher salt and ½ teaspoon freshly cracked black pepper.
🍽️ Step 5: Garnish and Serve Immediately
Transfer the finished grains to a serving bowl and garnish with 1 tablespoon chopped fresh parsley leaves. The parsley adds a pop of color and freshness that balances the nutty, toasted flavors. Serve immediately while still warm for the best texture contrast between the crispy edges and silky centers.
This dish holds well for 2 hours at room temperature, but for maximum enjoyment, serve within 30 minutes of cooking. The texture contrast is what makes this recipe special—each bite should deliver that satisfying crunch followed by the comforting silkiness of perfectly cooked grains.
Pro Tips For Making 5 Grain Rice
- TOAST THE MILLET FIRST: I learned this the hard way—skipping this step turns millet into a mushy afterthought. Dry-toast it in a separate pan over medium heat for 3-4 minutes until it smells nutty, then add it to the pot last. The extra effort keeps its texture distinct and prevents it from turning to paste.
- RINSE BASMATI LAST: Rinse the basmati separately after prepping the other grains—it releases starch like crazy. Cold water, swirl gently, then drain. This keeps it light and fluffy while letting the denser grains (barley, brown rice) soak up more flavor without getting gummy.
- STEAM DON’T BOIL: After initial cooking, cover the pot and switch to low heat or even turn off the burner. Let it steam for 10 minutes—this evens out moisture without turning barley into mush or quinoa into a gluey mess. (Yes, I know it’s tempting to peek.)
- USE BROTH NOT WATER: Swap half the water for low-sodium vegetable or chicken broth—it’s the easiest upgrade. The barley and brown rice will absorb the flavor, and the basmati won’t taste bland. Save the salt until the end, or you’ll end up with a salty crust on top.
Common mistakes when making your 5 grain rice
Skipping the Toast
I’ve seen so many people rush this step and end up with bland, mushy grains. Toasting the grains in butter (or oil) until they’re golden and nutty is what unlocks their full flavor potential. If you skip it, you’ll miss that irresistible crunch and depth of flavor. Trust me, the extra 5-7 minutes of stirring is worth it for that restaurant-quality texture. 🌟
Using the Wrong Broth
Some cooks think any broth will do, but low-sodium chicken broth is key here. It adds just the right amount of savory depth without overpowering the grains. If you use high-sodium broth, your grains will taste flat and bland. For a vegan version, swap in vegetable broth, but don’t expect the same rich flavor profile. Stick to the recipe for best results.
Lifting the Lid Too Soon
Peeking under the lid while the grains cook is a common mistake that adds unnecessary time to your cooking process. Every time you lift the lid, you release steam, which means the grains will take longer to absorb the liquid. After adding the broth, let the grains simmer undisturbed for the full 20 minutes. Patience here ensures perfectly cooked grains every time.
Overcooking the Grains
One of the biggest mistakes is letting the grains sit too long on the heat. Overcooking turns them mushy and loses that beautiful texture contrast. After the initial 20 minutes of simmering, check the grains and adjust the heat or time as needed. If they’re still too firm, add a splash of water and cover for another 5 minutes. But don’t let them sit too long after they’re done—serve them while they’re still warm and have that satisfying crunch.
Ignoring the Resting Time
Many people skip the 10-minute resting period after cooking, but this step is crucial. Resting allows the grains to fully hydrate and develop their final texture. If you serve them immediately, they’ll be unevenly cooked and lack that perfect balance of crispy edges and tender centers. Let them rest covered, and you’ll be rewarded with beautifully textured grains every time. ✨
Overlooking Seasoning Adjustments
Some cooks forget that the flavors of the grains and broth can change as they cool. Always taste the grains before serving and adjust the seasoning with salt and pepper as needed. The grains might need a little more salt after resting, so keep that kosher salt handy. A light drizzle of extra-virgin olive oil and fresh parsley can also elevate the dish before serving.
Nutrition facts
Frequently asked questions
Can I substitute any of the grains in this recipe?
The key is maintaining texture contrast. Swap millet for farro or buckwheat, or replace barley with wild rice blend. Keep the total volume the same—just ensure you have a mix of long, medium, and short-grain textures. For example, if using quinoa (which cooks faster), reduce the cooking time by 2-3 minutes.
How do I make this vegan?
Replace the butter with 2 tbsp avocado oil or coconut oil for toasting, and use vegetable broth instead of chicken broth. The flavor will be equally rich—just slightly more neutral. For extra depth, add 1 tsp soy sauce or miso paste to the broth. The texture remains identical, just plant-powered!
Can I cook this in an Instant Pot or rice cooker?
Yes! For the Instant Pot, toast the grains in butter as directed, then add broth and cook on high pressure for 10 minutes. Let the pressure release naturally for 10 minutes before opening. In a rice cooker, toast the grains first, then add broth and cook on the white rice setting (about 25-30 minutes
Why does my 5-grain rice turn out mushy?
Mushiness usually happens from overcooking or insufficient toasting. Always toast the grains until fragrant and golden—this creates a protective barrier. After adding broth, simmer uncovered for the last 5 minutes if needed to evaporate excess moisture. Also, avoid lifting the lid during cooking—steam release adds 5-10 minutes to cook time!
How long can I store cooked 5-grain rice?
Store cooked grains in an airtight container in the fridge for 4-5 days or freeze for 3 months. To reheat, add 2 tbsp water or broth per cup of grains and cover until warmed through. For extra crunch, toast reheated grains in a dry skillet for 2-3 minutes before serving. The flavors actually improve after resting overnight!