
Main Courses
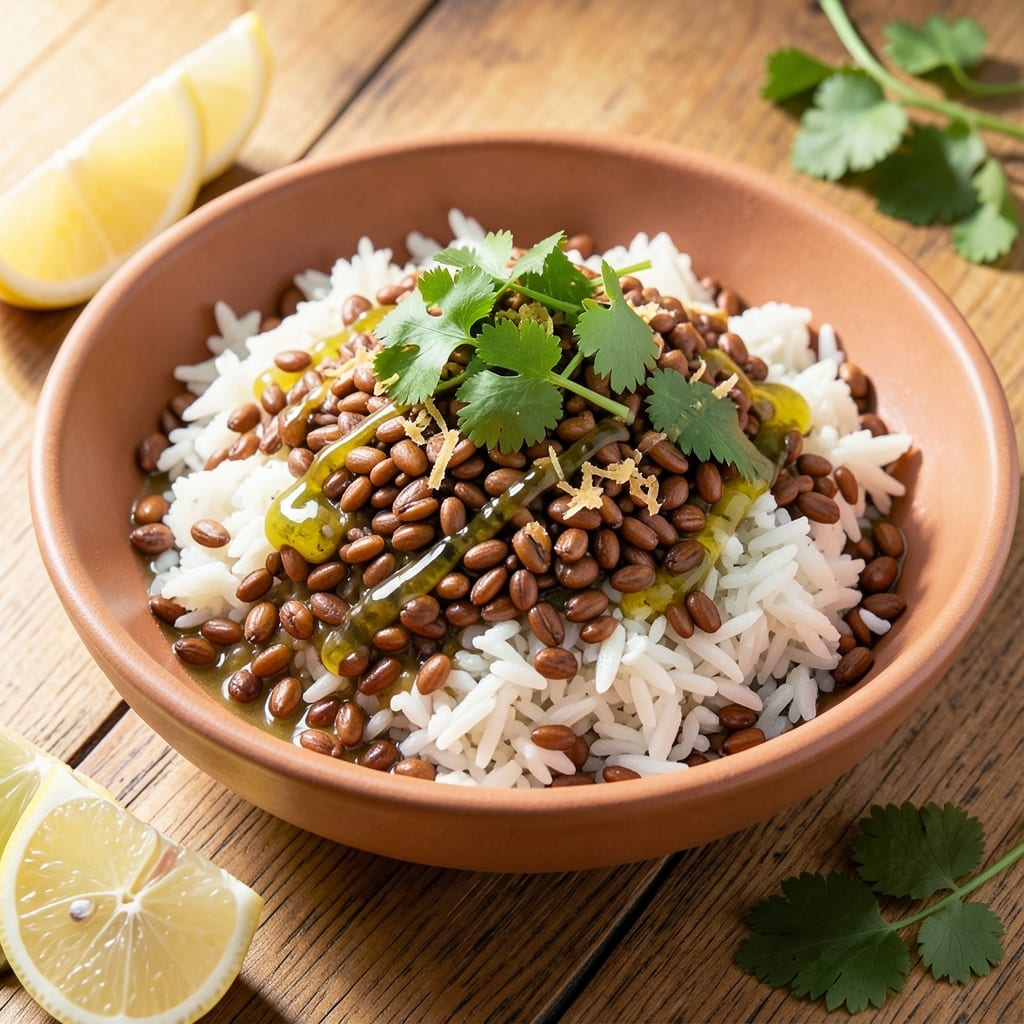
The amaranth rice recipe transforms simple grains into a protein-packed, gluten-free bowl that’s surprisingly versatile. This earthy, nutty dish combines two ancient grains for a texture that’s both satisfying and nutrient-dense—perfect for breakfast, a hearty side, or even a complete meal. The secret lies in toasting the amaranth first to deepen its natural flavor, then simmering it with rice for a cohesive, flavorful base.
What sets this recipe apart is its adaptability: toss in roasted vegetables for a savory bowl, or sweeten it with cinnamon and fruit for a warm breakfast porridge. The amaranth adds a satisfying chew and boosts protein content, while the rice keeps it familiar and comforting. With just a few pantry staples and simple techniques, you’ll create a dish that’s both restaurant-worthy and effortlessly healthy.
By the time you’re done, you’ll have a golden, fragrant bowl with a perfect balance of textures—creamy rice and slightly crunchy amaranth. The earthy, nutty flavors shine without overpowering, making it a blank canvas for your favorite herbs, spices, or toppings. Whether you’re meal prepping for the week or whipping up dinner in 30 minutes, this recipe delivers.
Pair it with sautéed greens, a drizzle of tahini, or fresh cilantro for extra brightness. The possibilities are endless, but the foundation—this amaranth rice blend—is foolproof and always impressive. Let’s get cooking!
Ingredients for amaranth rice
Toasted amaranth meets fluffy rice in this protein-rich, gluten-free bowl that’s ready in 30 minutes.
| Ingredient | Amount | Notes |
|---|---|---|
| Amaranth Grains 🌾 | 1 cup | Rinsed thoroughly before toasting |
| White Basmati Rice 🍚 | 1 cup | Long-grain preferred for texture |
| Vegetable Broth 💧 | 3 cups | Low-sodium, homemade or store-bought |
| Extra-Virgin Olive Oil 🫒 | 2 tbsp | For toasting amaranth and rice |
| Fresh Cilantro 🌿 | ¼ cup | Chopped, for garnish and flavor |
| Lemon Juice 🍋 | 1 tbsp | Freshly squeezed for brightness |
| Ground Cumin 🌿 | ½ tsp | Toasted for deeper aroma |
| Smoked Paprika 🌶️ | ½ tsp | For earthy, smoky depth |
| Sea Salt 🧂 | ¾ tsp | Diamond Crystal preferred |
| Black Peppercorns 🌶️ | ¼ tsp | Freshly cracked for texture |
| Cinnamon 🌿 | ¼ tsp | Optional, for sweet variations |
| Tahini 🥜 | 2 tbsp | For drizzling, optional topping |
| Fresh Lime 🍋 | 1 whole | Juiced, for serving |
Amaranth is the star here—look for the organic variety at Whole Foods or bulk bins for the best texture. Bob’s Red Mill amaranth is a solid choice if you’re shopping online. Toast it until fragrant (about 5 minutes) to deepen its nutty flavor—don’t skip this step or the dish will taste flat. The basmati rice should be long-grain and uncooked—anything pre-cooked or instant won’t give you that satisfying bite. If you’re prepping ahead, store the dry grains separately until ready to cook.
No amaranth? Quinoa or buckwheat works in a pinch, though texture will differ slightly. Short on vegetable broth? Water with a bouillon cube gets you close, but add a pinch of soy sauce or miso paste for umami depth. The spices are non-negotiable—smoked paprika and cumin are what give this dish its signature earthy profile. Fresh herbs are ideal, but dried cilantro or oregano at half the amount works if you’re in a bind. For the tahini, store-bought is fine, but homemade (blended sesame seeds + olive oil) adds extra richness.
This keeps 4-5 days in the fridge, making it perfect for meal prep. Portion into containers with a thin layer of olive oil on top to preserve freshness. For serving, a squeeze of lime juice and extra cilantro brightens it up instantly. Freezes beautifully for up to 3 months—just reheat with a splash of water to restore texture. The amaranth holds its shape better than rice when reheated, so it’s ideal for leftovers.
Why You'll Love This Recipe
- One-Pot Magic: I swear by this recipe because it’s actually one-pot—no rice cooker, no straining, no fuss. Just toss amaranth and basmati into simmering broth with a glug of olive oil, cover, and let it do its thing. Twenty minutes later, you’ve got fluffy, nutty grains with zero cleanup.
- Nutty Earthy Crunch: Between us, amaranth has this unfair texture—chewy little bursts that hold up perfectly against the basmati’s fluff. Toss in bright cilantro at the end, and suddenly your rice isn’t just a side; it’s the star. Honestly, the first time I made this, my roommate stole half the pot.
- Lunchbox Hero: This keeps beautifully for days—no soggy rice here. Pack it cold for work or reheat it gently for dinner, and it’s still got that satisfying bite. I’ll be real: I’ve eaten this for breakfast with a fried egg, and no one judged me. (Okay, maybe my cat did.)
- Budget Protein Boost: Amaranth’s packed with protein and minerals, but it’s still cheaper than quinoa or fancy grains. Mix it with basmati to stretch your rice further, and you’ve got a filling, fiber-rich side that won’t break the bank. Plus, vegetable broth? That’s just flavor on a budget. Win-win.
Step-by-step instructions for amaranth rice bowl with earthy nutty flavor
Here's how to create a perfectly balanced amaranth rice blend with rich texture and vibrant flavors.
🍳 Step 1: Toast the Amaranth and Rice for Deep Flavor
Heat a medium saucepan over medium-high heat and add the 2 tablespoons extra-virgin olive oil. Once shimmering, add the 1 cup amaranth grains and 1 cup white basmati rice together. Stir constantly for 3-4 minutes until the amaranth becomes fragrant and the rice grains turn translucent at the edges.
This toasting step is crucial—it develops the nutty flavor of amaranth and prevents it from becoming mushy. You'll know it's ready when you smell that distinct toasted aroma and see the grains begin to puff slightly. Keep a close eye on it to prevent burning, as amaranth can toast quickly.
🍳 Step 2: Add Spices and Broth for Complex Layers
Immediately add the 0.5 teaspoon ground cumin, 0.5 teaspoon smoked paprika, 0.75 teaspoon sea salt, 0.25 teaspoon black peppercorns, and 0.25 teaspoon cinnamon to the toasted grains. Stir for 30 seconds to coat everything evenly with the spices.
Next, pour in the 3 cups vegetable broth all at once. Bring to a gentle boil, then immediately reduce heat to low. Cover the pan with a tight-fitting lid and let it simmer for 25 minutes. The amaranth will absorb more liquid than rice, so don't be alarmed if it looks dry at first—it will finish cooking in the broth.
⏰ Step 3: Rest and Fluff for Perfect Texture
After 25 minutes, turn off the heat and let the grains rest covered for 10 minutes. This resting period allows the amaranth to fully hydrate and the flavors to meld together. During this time, the grains will continue to absorb moisture and develop their signature chewy texture.
Once rested, fluff the grains gently with a fork, being careful not to mash them. The amaranth should be tender but still hold its shape, while the rice should be perfectly al dente. If there's any remaining liquid, uncover and let it evaporate for 2-3 minutes—this final step ensures you have a dry, fluffy base that won't turn mushy.
👨🍳 Step 4: Finish with Bright Citrus and Tahini Drizzle
Transfer the warm amaranth rice to a serving bowl. Drizzle with the 2 tablespoons tahini and 1 tablespoon lemon juice, tossing gently to combine. The tahini adds a creamy richness that balances the earthy amaranth perfectly.
Garnish with the 0.25 cup chopped fresh cilantro and finish with freshly squeezed juice from the 1 whole fresh lime. The bright acidity cuts through the richness while enhancing all the warm spices. Serve immediately while still warm for the best texture and flavor experience.
Pro Tips For Making Amaranth Rice
- Toast the Amaranth First: I learned this the hard way—skipping the toasting step means your amaranth stays bland and gummy. Dry-toast the grains in a separate pan with olive oil for 3-4 minutes until they smell nutty and pop. This releases their earthy flavor and prevents them from turning mushy when cooked.
- Use Two Pots: Amaranth and basmati rice cook at different speeds, so resist the urge to mix them in one pot. Cook the amaranth first (it needs 20-25 minutes), then add the rice to the same broth for its final 10 minutes—this way, they absorb flavor equally without one overcooking.
- Salt the Broth Early: Don’t wait until the end to season. Add half the salt to the broth before cooking the amaranth, and the rest when you add the rice. Amaranth soaks up liquid aggressively, and starting with salted broth ensures even seasoning—no last-minute guesswork.
- Finish with Cold Broth: The rice will look dry when the amaranth is done, but don’t panic. Remove the pot from heat, stir in ¼ cup cold vegetable broth, then cover and let sit for 5 minutes. The residual heat will plump everything up without turning it gluey—trust me, this is the thing that matters most.
Regional styles of this recipe
Mexican-Inspired Flavor
Transform this dish into a Mexican-inspired bowl by swapping smoked paprika for 1 tsp chili powder and ½ tsp dried oregano. Add ½ cup black beans and ½ cup corn kernels during the last 5 minutes of cooking. Top with avocado slices, pickled red onions, and a drizzle of lime crema (mix 2 tbsp sour cream with 1 tbsp lime juice). This version is perfect for tacos or as a hearty side with grilled fish. 🌶️
Japanese-Inspired Sesame Bowl
For a Japanese-inspired twist, replace the spices with 1 tsp toasted sesame seeds, ½ tsp grated ginger, and ½ tsp soy sauce in the broth. Stir in 1 tbsp mirin and 1 tbsp rice vinegar at the end. Garnish with thinly sliced scallions, toasted sesame seeds, and a drizzle of tahini mixed with a splash of water to mimic sesame dressing. Serve with miso-glazed tofu or grilled shrimp for a complete meal. ✨
Mediterranean Herb Version
Give it a Mediterranean flair by adding 1 tsp dried thyme, ½ tsp dried rosemary, and ½ tsp garlic powder to the spices. Use 3 cups chicken or vegetable broth infused with 1 sprig rosemary and 2 garlic cloves. Finish with ¼ cup chopped kalamata olives, ¼ cup crumbled feta cheese, and a drizzle of extra-virgin olive oil. This version pairs beautifully with grilled halloumi or roasted vegetables. 🌿
Indian-Spiced Masala Style
For an Indian-inspired twist, toast the amaranth and rice with 1 tsp cumin seeds, ½ tsp turmeric, and ½ tsp coriander seeds (lightly crushed). Use 3 cups coconut milk instead of broth for richness. Stir in ½ tsp garam masala at the end and garnish with fresh cilantro, toasted cashews, and a squeeze of lime. Serve with raita or yogurt for dipping. 🌟
Sweet Breakfast Porridge
Turn this into a sweet breakfast porridge by omitting the smoked paprika and adding ½ tsp cinnamon, ¼ tsp nutmeg, and 1 tbsp honey or maple syrup to the broth. Stir in ½ cup raisins or chopped dates during the last 5 minutes of cooking. Top with sliced banana, toasted pecans, and a drizzle of almond butter. Serve warm with a sprinkle of sea salt for balance. 🍯
Thai-Inspired Coconut Curry
Create a Thai-inspired version by cooking the grains in 3 cups coconut milk with 1 tbsp red curry paste (like Maesri). Add ½ tsp lemongrass paste (or 1 tbsp fresh juice) and ½ tsp galangal or ginger. Garnish with thinly sliced red chili, fresh Thai basil, and a squeeze of lime. Serve with grilled chicken or tofu for a fragrant, aromatic bowl. 🌺
Nutrition facts
Frequently asked questions
Can I substitute amaranth with another grain?
Yes! If you can't find amaranth, try quinoa or buckwheat for a similar texture. For a closer flavor match, use millet or freekeh, though cooking times may vary. Always toast your substitute first to enhance nuttiness—this step is key for depth.
How do I prevent the amaranth from turning mushy?
Toast the amaranth for 3-4 minutes until fragrant before adding liquid—this builds a protective crust. Use a 1:3 ratio of grains to broth (1 cup grains to 3 cups liquid) and simmer on low heat with the lid slightly ajar for the last 5 minutes to evaporate excess moisture.
Is this recipe naturally gluten-free?
Both amaranth and white basmati rice are gluten-free grains. Just ensure your vegetable broth and spices are certified gluten-free if you have celiac disease or sensitivity. The tahini and lime juice are also naturally gluten-free, making this dish safe for most dietary restrictions.
Can I make this ahead of time?
Yes, but store the cooked grains separately in the fridge for 4-5 days. Reheat with a splash of water or broth to restore texture. For best results, assemble bowls fresh with toppings like avocado or herbs—these add brightness when combined with warm grains.
What are the best toppings for this dish?
For savory bowls, try toasted pumpkin seeds, avocado slices, or pickled onions. Sweet versions shine with banana slices, toasted pecans, and a drizzle of honey. Always finish with fresh herbs like cilantro or parsley for brightness and color.