
Main Courses
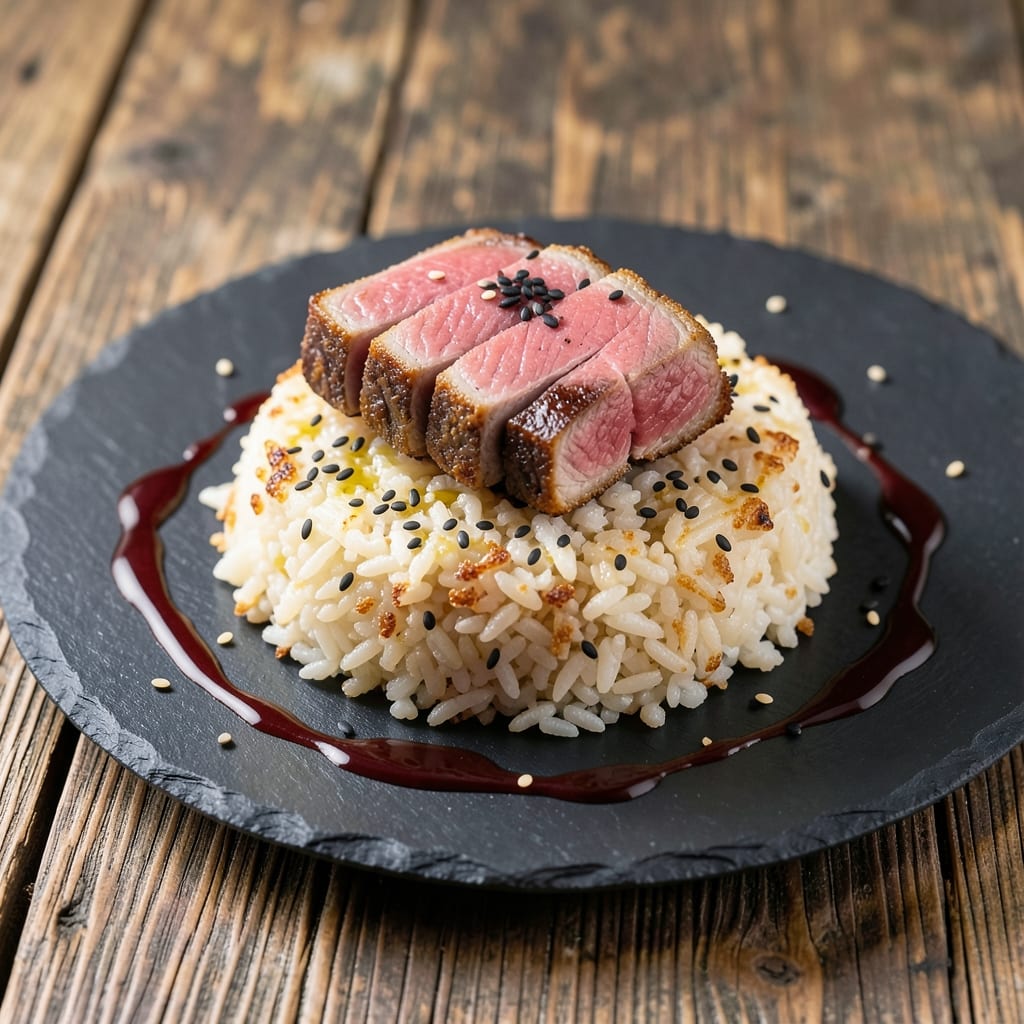
This ahi tuna crispy rice recipe delivers restaurant-quality bites with perfectly crispy sesame-crusted tuna atop buttery, golden rice bases. The secret lies in high-heat searing for the tuna and a crispy rice technique that transforms ordinary grains into flavorful platforms. I developed this after years of perfecting Japanese izakaya-style appetizers, where texture and balance are everything.
The tuna is lightly seared just until warm (never overcooked) while the rice gets its signature crunch through a quick pan-toast with butter and sesame oil. This method ensures the tuna stays tender and the rice develops that coveted crispy exterior that holds up perfectly. The combination of umami-rich tuna with nutty sesame and buttery rice creates a flavor profile that's both elegant and satisfying.
What makes this recipe stand out is the attention to texture contrast—crispy rice beneath tender tuna creates each bite's harmony. The preparation is straightforward but requires precise timing to maintain both components' integrity. Whether serving as an appetizer or light main course, these bites will impress without requiring advanced techniques.
For proper handling of raw fish, I'll include critical safety guidelines to ensure perfect results every time. The plating suggestions will help you present these bites like a professional chef. Let's get started on creating this sophisticated yet approachable dish that's perfect for any occasion.
Ingredients for ahi tuna crispy rice
Japanese short-grain rice, premium ahi tuna, and toasted sesame seeds create this restaurant-quality dish.
| Ingredient | Amount | Notes |
|---|---|---|
| Sushi-Grade Ahi Tuna 🐟 | 1 lb | Freshly cut into 1-inch cubes |
| Japanese Short-Grain Rice 🍚 | 1 ½ cups | Uncooked, preferably Koshihikari |
| Sesame Seeds 🥜 | ½ cup | White or black, toasted |
| Unsalted Butter 🧈 | 4 tbsp | European-style preferred |
| Sesame Oil 🫒 | 1 tbsp | Toasted, for rice crispiness |
| Soy Sauce 🍶 | 2 tbsp | Kikkoman preferred for balance |
| Mirin 🍶 | 1 tbsp | Sweet rice wine for depth |
| Rice Vinegar 🍶 | 1 tbsp | Seasoned preferred for umami |
| Ginger Root 🧅 | 1 tbsp | Freshly grated, finely minced |
| Garlic Cloves 🧄 | 3 cloves | Minced into fine paste |
| Vegetable Oil 🫒 | 2 tbsp | High smoke point for searing |
| Diamond Crystal Kosher Salt 🧂 | ½ tsp | For rice seasoning |
| White Pepper 🌶️ | ¼ tsp | Freshly ground for finish |
| Lemon Wedges 🍋 | 2 whole | For serving, freshly cut |
| Microgreens 🌱 | ¼ cup | Optional garnish for plating |
The foundation starts with Japanese short-grain rice—Koshihikari if you can find it. It has the perfect balance of stickiness and texture for crispy rice. Trader Joe's and Asian markets carry excellent brands like Nippon or Calrose. For the tuna, sushi-grade is non-negotiable—ask your fishmonger for the freshest cut, ideally vacuum-sealed. The sesame seeds should be toasted in a dry pan for 2-3 minutes until fragrant; store-bought toasted seeds often lose their punch. Ginger and garlic need to be finely minced—a microplane works best for ginger to avoid stringiness.
No mirin? Substitute 1 tsp sugar plus 1 tbsp dry sake—the sweetness is crucial for balancing the soy. Running short on sesame oil? Lightly toast more sesame seeds and grind them into a paste for a similar effect, though the flavor won't be identical. For the rice, substitute jasmine rice if needed, but expect slightly less crispiness. The butter matters here—European-style has higher fat content, which creates better browning. If you can't find it, regular unsalted butter works, but render it in the pan longer to compensate. For plating, microgreens from Whole Foods add that professional touch.
Store cooked rice in an airtight container with a paper towel pressed on top to prevent sogginess—keeps for 3 days in the fridge. The tuna should be seared and served immediately; never refrigerate raw tuna before cooking. For make-ahead convenience, prepare the rice mixture up to 1 day ahead and refrigerate the components separately. Reheat the rice portion in a dry skillet over medium heat until crispy again (2-3 minutes). The sesame seeds lose their crunch when stored, so toast fresh before serving.
Why You'll Love This Recipe
- One-Pan Magic: I swear by this—just toast the rice in butter, sear the tuna, and sprinkle sesame seeds. No chopping, no mess, and the pan does 90% of the work while I sip my coffee.
- Buttery Crispy Edge: That first bite? Warm, buttery rice with a crunch from toasted sesame seeds and the rich, clean flavor of ahi tuna—it’s like a fancy sushi bowl without the fuss. Honestly, my picky eaters actually finish their plates.
- Lunchbox Hero: Pack this for work or school—it holds up perfectly for hours. The tuna stays tender, the rice stays crispy (if you reheat it right), and it’s way more exciting than a sad sandwich. (Yes, even on a Tuesday.)
- Budget-Smart Luxury: Sushi-grade tuna feels special, but a single steak stretches across two servings, and the rice costs pennies. I treat it like a restaurant meal without the sticker shock—sesame oil and butter make it taste like a splurge.
Step-by-step instructions for sesame-crusted ahi tuna crispy rice
Master the balance of crispy rice bases and perfectly seared tuna with this precise method.
Prepare the Buttery Rice Bases
Rinse the 1.5 cups Japanese short-grain rice under cold water until the water runs clear, then drain well. In a medium saucepan, combine the rice with 2 cups water, 0.5 tsp Diamond Crystal kosher salt, and 1 tbsp mirin. Bring to a boil over medium-high heat, then reduce to low heat, cover, and simmer for 15 minutes. Remove from heat and let steam for 10 minutes without lifting the lid.
While the rice steams, melt 2 tbsp unsalted butter in a nonstick skillet over medium heat. Spread the cooked rice evenly in the skillet, pressing gently with a spatula to create ¼-inch thick bases. Cook for 3-4 minutes until the bottoms are golden brown and crispy. Transfer to a plate and repeat with the remaining rice, keeping the bases warm.
Create the Sesame-Garlic Crust
In a small bowl, combine 0.5 cup toasted sesame seeds, 1 tbsp finely minced ginger root, 3 cloves minced garlic, 0.25 tsp white pepper, and 1 tbsp toasted sesame oil. Mix well to create a cohesive crust. This blend will encase the tuna, adding texture and depth of flavor with every bite.
Cut the 1 lb sushi-grade ahi tuna into 1-inch cubes and pat them dry with paper towels. Roll each tuna cube in the sesame mixture, pressing gently to ensure full coverage. Place the coated tuna cubes on a plate and refrigerate for 15 minutes to help the crust adhere.
Sear the Tuna to Perfect Doneness
Heat 2 tbsp vegetable oil in a skillet over high heat until shimmering. Working in batches, add the tuna cubes and sear for 1 minute 30 seconds until the crust is deeply golden and the internal temperature reaches 125°F (medium-rare). Avoid overcrowding the pan to maintain even heat distribution.
Transfer the seared tuna to a plate and tent loosely with foil to keep warm. The tuna should be just firm to the touch but still slightly springy in the center. If you prefer a different doneness, adjust the cooking time by 15-30 seconds increments.
Assemble and Garnish
Return the crispy rice bases to the skillet over low heat for 30 seconds to warm through. Place 1 tuna cube on each rice base and drizzle with 1 tbsp soy sauce and 1 tbsp rice vinegar. The acidity of the vinegar brightens the rich flavors of the tuna and sesame.
Garnish each serving with 2 lemon wedges and 1 tablespoon microgreens for color and freshness. Serve immediately while the rice remains crispy and the tuna is at its optimal temperature. The combination of textures—crispy rice, tender tuna, and delicate greens—makes this dish unforgettable.
Pro Tips For Making Ahi Tuna Crispy Rice
- CRISP THE TUNA RIGHT: Use a nonstick skillet and keep the heat high—medium-high is too gentle. You want that crust in 60-90 seconds, not a sad, greasy mess. Flip once, then let it sear undisturbed until the edges pull away like a perfect golden shield.
- DON’T OVERCOOK THE RICE: Japanese short-grain rice is finicky—once it’s fluffy and slightly sticky, take it off the heat immediately. I learned this the hard way: leaving it on the burner another minute turns it into glue. Cover it and let the residual steam do the work.
- SALT THE TUNA BEFORE SEARING: Pat the tuna dry, then sprinkle a pinch of salt on both sides 5 minutes before cooking. This isn’t just seasoning—it helps the crust form and keeps the flesh from sticking like a stubborn toddler. (Yes, even if you’re impatient like me.)
- TOAST SESAME SEEDS FIRST: Skip the raw seeds—they’ll just sit there like awkward guests. Dry-toast them in the same pan you crisp the tuna (just 30 seconds) for nutty depth. They’ll darken slightly, and the aroma? Game-changer. (Your future self will thank you.)
Best sauces and condiments for this recipe
Classic Soy-Ginger Drizzle
Start with a simple yet transformative soy-ginger drizzle made by combining 1 tbsp soy sauce, 1 tsp mirin, ½ tsp grated ginger, and ½ tsp toasted sesame oil. Warm this mixture gently in a small saucepan until fragrant, then strain out any ginger fibers. Drizzle ½ teaspoon over each tuna-rice bite just before serving—this adds a bright, umami-rich finish that cuts through the richness. 🌟
Spicy Sriracha Mayo
For those who love heat, whip together 2 tbsp mayonnaise, ½ tsp sriracha, and a pinch of white pepper for a creamy, spicy contrast. Spoon ½ teaspoon onto each plate alongside the tuna bites. The coolness of the mayo balances the crispy rice and seared tuna, while the sriracha adds a kick that lingers. I like to use Duke's mayo for its rich, slightly tangy profile.
Yuzu Kosho Glaze
If you can find yuzu kosho (citrus chili paste), this is a game-changer. Mix ½ teaspoon with 1 tsp honey and a splash of water to create a glossy glaze. Drizzle lightly over the tuna bites—its citrusy, spicy-sweet notes elevate the dish to izakaya-level sophistication. No yuzu kosho? Substitute with a mix of ½ tsp sriracha and ½ tsp lemon juice for a similar effect.
Sesame Miso Butter
For a richer, deeper flavor, blend 1 tbsp unsalted butter, ½ tsp white miso paste, and ½ tsp toasted sesame seeds until smooth. Warm the mixture in a small pan until melted, then dollop ½ teaspoon onto each plate. The umami from the miso and nutty sesame adds a luxurious touch that pairs beautifully with the tuna's natural sweetness. 💛
Lemon-Yuzu Emulsion
Brighten the dish with a lemon-yuzu emulsion by whisking together 2 tbsp lemon juice, 1 tsp yuzu juice (or extra lemon juice), 1 tsp honey, and 1 tbsp neutral oil like avocado oil. This light, citrusy drizzle adds freshness and cuts through the richness of the seared tuna. Serve with a small squeeze bottle for guests to customize their bites.
Nutrition facts
Frequently asked questions
Can I make this recipe with frozen ahi tuna?
Never use frozen ahi tuna for this dish! Fresh, sushi-grade ahi is essential for both safety and texture. Frozen tuna loses moisture and develops an icy texture that won't sear properly. If you must use previously frozen tuna, thaw it overnight in the refrigerator first, but it won't match the quality of fresh fish.
How do I keep the rice crispy after assembly?
Work quickly and serve immediately for maximum crispiness! The rice loses its crunch if left sitting. If you need to prepare ahead, cook the rice bases completely (without tuna) and store them in an airtight container with a paper towel on top. Reheat in a dry skillet for 1-2 minutes just before serving.
What's the best way to store leftover tuna-rice bites?
Store the components separately for best results. Keep the cooked rice bases in an airtight container with a paper towel to absorb moisture, and refrigerate the seared tuna (without rice) for up to 2 days. Reheat the rice separately in a skillet until crispy, then add fresh tuna that's been lightly seared again.
Can I substitute regular rice for Japanese short-grain?
While possible, it won't achieve the same texture. Regular long-grain rice becomes too dry, while basmati gets overly sticky. If you must substitute, use jasmine rice and reduce cooking time by 2 minutes—it's the closest alternative. The rice needs to be slightly sticky to hold the tuna properly.
How do I adjust this for a gluten-free diet?
This recipe is naturally gluten-free! Just ensure your soy sauce is tamari (gluten-free soy sauce) and check sesame seed packaging for cross-contamination warnings. The sesame crust remains safe as long as it's processed in a dedicated facility. All other ingredients are inherently gluten-free.