
Main Courses
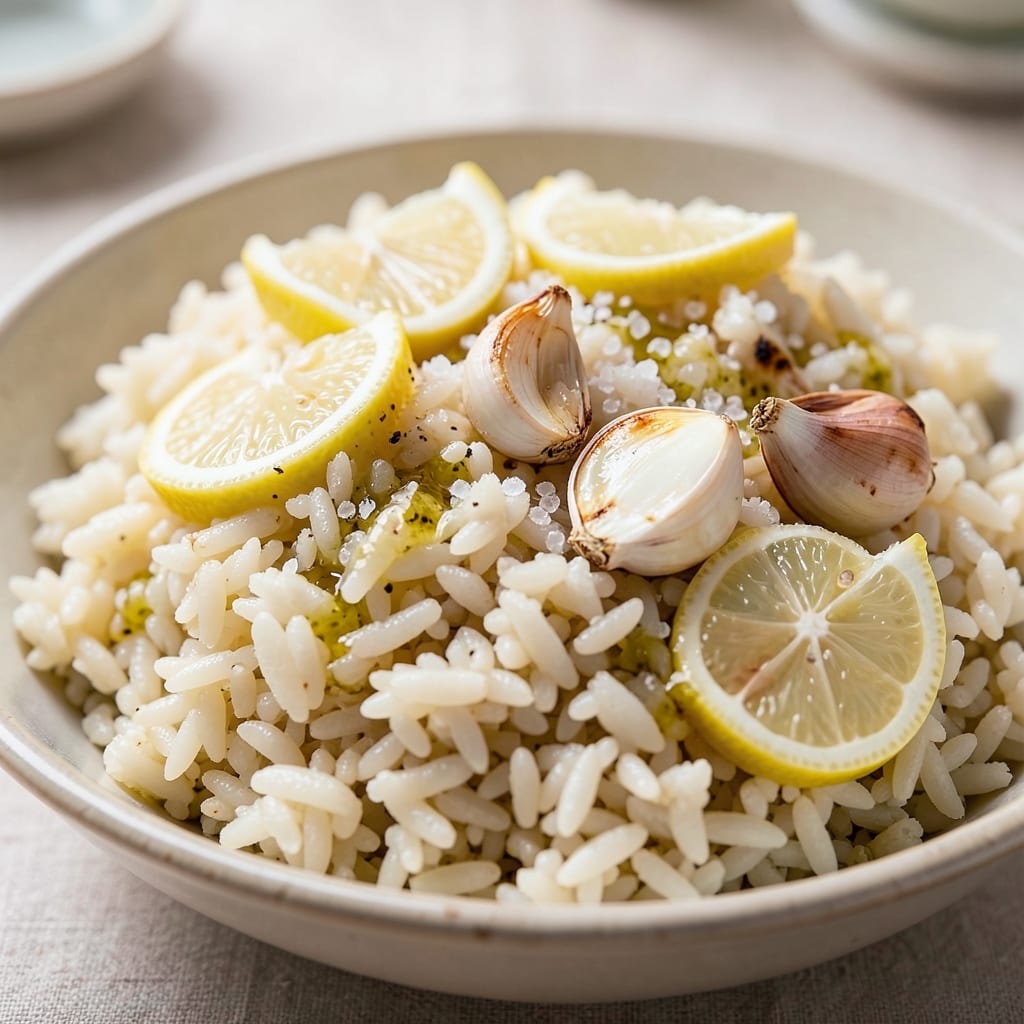
An 8-qt Instant Pot rice recipe transforms your pressure cooker into the ultimate multitasking kitchen tool—fluffy, perfectly cooked rice in under 30 minutes with minimal cleanup. This foundational technique works for white, brown, or even flavored rice, making it the secret weapon behind countless one-pot meals. The key lies in precise water ratios, controlled pressure, and natural steam that eliminates the guesswork of stovetop cooking.
What sets this method apart is its foolproof reliability—no burnt bottoms, no uneven cooking, and no need for constant monitoring. The Instant Pot’s sealed environment locks in moisture while building steam pressure, ensuring every grain absorbs liquid evenly. Whether you're prepping for a crowd or simply craving restaurant-quality rice, this recipe delivers consistent, restaurant-style results with just three essential ingredients: rice, water, and salt.
The beauty of this approach extends beyond simplicity—it’s a time-saver that transforms weeknight dinners. Cook your rice base first, then add proteins or vegetables directly to the pot for hands-off, flavorful meals. The natural release method preserves texture, while the one-pot convenience means fewer dishes and more time enjoying the meal. Perfect for beginners and seasoned cooks alike, this technique redefines how you approach rice in your kitchen.
From classic white rice to nutty brown or aromatic basmati, this recipe adapts to your needs while maintaining that signature fluffy, separate-grain texture. Pair it with stir-fries, curries, or even as a side for roasted meats. The possibilities are endless, all starting with this essential foundation. Let’s get started on mastering your Instant Pot rice game.
Ingredients for 8 qt instant pot rice
Three core ingredients plus optional enhancers create the perfect Instant Pot rice foundation for one-pot meals.
| Ingredient | Amount | Notes |
|---|---|---|
| Long-Grain White Rice 🌾 | 2 cups | Uncooked, rinsed thoroughly |
| Water 💧 | 2 ½ cups | Room temperature preferred |
| Kosher Salt 🧂 | ½ tsp | Diamond Crystal preferred |
| Extra-Virgin Olive Oil 🫒 | 1 tbsp | For coating rice grains |
| Fresh Lemon Juice 🍋 | 1 tbsp | Brightens flavor (optional) |
| Garlic Cloves 🧄 | 2 cloves | Minced for aromatic base |
| Fresh Parsley 🌿 | ¼ cup | Chopped for garnish (optional) |
| Vegetable or Chicken Broth 🍲 | ½ cup | For enhanced flavor (optional) |
| Butter 🧈 | 1 tbsp | Unsalted for finishing (optional) |
| Brown Rice 🌾 | 2 cups | Substitute for white rice (adjust water) |
| Basmati Rice 🌾 | 2 cups | Substitute for white rice (adjust water) |
| Jasmine Rice 🌾 | 2 cups | Substitute for white rice (adjust water) |
The rice variety dictates texture and cooking time—long-grain white delivers the signature fluffy, separate-grain consistency ideal for pilafs and stir-fries, while brown or basmati require slightly longer pressure times. For restaurant-quality results, sushi-grade white rice from Trader Joe's or Calrose from specialty stores yields superior starch content. Rinse rice thoroughly before cooking to remove excess surface starch, which prevents clumping. The 8-quart Instant Pot is essential here—smaller models risk uneven cooking, while larger ones may require adjusting water ratios for consistent steam pressure.
Water temperature matters—room temperature ensures even absorption, while cold water can create uneven cooking pockets. The 2.5:1 liquid-to-rice ratio is your baseline, but adjust up to 3:1 for brown rice or down to 2:1 for basmati. For extra flavor depth, vegetable broth adds umami without altering texture, while lemon juice brightens the final dish. The olive oil coating (optional but recommended) prevents grains from sticking during natural release. Swap kosher salt for sea salt if preferred, but measure carefully—Diamond Crystal's coarser grains yield less volume by weight. For a richer finish, unsalted butter infused with minced garlic elevates the dish to gourmet levels.
Cooked rice maintains peak texture for 2-3 days in the fridge when stored in an airtight container with parchment paper between layers to prevent drying. For longer storage, freeze portions in single-serving containers for up to 3 months—reheat with a splash of water and cover to restore moisture. The natural release method preserves texture, but quick-release works in a pinch for time-sensitive meals. For one-pot convenience, cook proteins or vegetables directly in the pot after rice—simply add them during the last 5 minutes of cooking time to prevent overcooking. This method transforms your Instant Pot into a multi-functional cooking system capable of handling everything from stir-fries to curries with minimal cleanup.
Why You'll Love This Recipe
- Bright & Simple Magic: That splash of lemon juice and drizzle of olive oil? It turns basic rice into something bright and actually tasty. No fancy spices needed—just a zesty lift that makes every bite feel special.
- Meal Prep MVP: Make it once, use it all week. Perfect for lunches, stir-fries, or even a quick bowl of rice with whatever’s in the fridge. (Yes, even on a Tuesday night when you’re exhausted.)
- Budget-Buster Basics: White rice, salt, and a little oil—this recipe costs pennies and stretches to feed a crowd. Leftovers? They reheat like a dream and taste just as good the next day.
Step-by-step instructions for perfect instant pot rice
Master this foolproof method for consistently fluffy, aromatic rice every time.
Prepare the Rice and Aromatics
Rinse the 2 cups long-grain white rice thoroughly under cold water until the water runs clear. This removes excess starch that would make the rice gummy. Drain well in a fine-mesh strainer and let it sit for 10 minutes to absorb any remaining moisture.
In a small bowl, combine the minced 2 cloves garlic, 0.5 cup vegetable or chicken broth, and 0.5 tsp kosher salt. Set aside. The garlic will infuse the broth with deep, savory flavor that carries through the entire dish. For extra brightness, add the 1 tbsp fresh lemon juice to the broth mixture—this prevents the rice from tasting flat.
Sauté the Rice in Olive Oil
Set your Instant Pot to "Sauté" mode and add the 1 tbsp extra-virgin olive oil. Once the oil shimmers (about 30 seconds on medium heat), add the drained rice. Stir continuously for 2-3 minutes until the grains become translucent at the edges and slightly toasted.
This step is crucial—it creates a nutty base flavor and prevents the rice from sticking. If the rice begins to brown too quickly, reduce the heat slightly. You want the grains to develop color but not burn. The oil also helps distribute the broth evenly for perfectly even cooking.
Add Liquid and Cook
Pour in the 2.5 cups water and the prepared broth mixture. Stir gently to combine, then secure the lid and set the valve to "Sealing." Select the "Pressure Cook" function for 8 minutes on high pressure.
During this time, the rice will absorb the liquid and cook under high pressure, resulting in tender grains with minimal effort. The 8-minute cook time is ideal for white rice—any longer risks overcooking. If using brown rice, basmati rice, or jasmine rice instead, increase the cook time to 22-25 minutes and adjust the liquid by ½ cup more for each substitute.
Natural Release and Finish
Once the cooking cycle completes, allow the pressure to release naturally for 10 minutes. This gradual release prevents the rice from becoming mushy. After 10 minutes, carefully move the valve to "Venting" to release any remaining pressure.
Open the lid and fluff the rice gently with a fork, then stir in the 1 tbsp unsalted butter and 0.25 cup chopped fresh parsley. The butter adds richness, while the parsley contributes a fresh, bright finish. For extra flavor, you can also drizzle with a bit more lemon juice or sprinkle with additional salt if needed.
Rest and Serve
Let the rice sit covered for 5 minutes to allow steam to redistribute evenly. This resting period ensures the grains are fully tender and prevents them from drying out. The rice should be light, fluffy, and separate—each grain should be distinct, not clumped together.
Serve immediately as the base for one-pot meals, stir-fries, or grain bowls. The aromatic broth and bright lemon notes make this rice versatile for both savory and slightly tangy dishes. Store any leftovers in an airtight container for up to 4 days, though it's best enjoyed fresh.
Pro Tips For Making 8 Qt Instant Pot Rice
- STIR BEFORE PRESSURE: Add that olive oil first, then swirl the pot to coat the bottom—don’t just pour it in. I learned this after my first batch came out with a greasy patch where the oil pooled. Once the rice is in, give it a quick stir to break up clumps before sealing.
- SALT THE WATER LIKE SOUP: Taste that water before adding rice—it should register as slightly salty, like the sea. Too little and the rice will taste bland; too much and you’ll regret it. Kosher salt is 1½ tsp for 8 cups water, but adjust if your salt is fine-grained or you’re using it in a humid climate.
- DON’T SKIP THE 10-MINUTE REST: Let that rice sit, lid off, for a solid 10 minutes after pressure releases. I know, you’re hungry now, but rushing this step turns fluffy rice into a gluey mess. The steam finishes cooking the grains evenly—trust me, your fork will thank you.
- LEMON JUICE LAST MINUTE: Add the lemon juice after resting, not before. The acid reacts with the hot rice and can make it gummy if introduced too early. A splash of fresh juice brightens the flavor, but if you’re in a pinch, zest the peel into the pot during the last 5 minutes of cooking—it infuses without overpowering.
Troubleshooting this recipe
Burnt Bottom Fix
If your rice develops a burnt layer at the bottom, it’s usually from residual oil or broth sticking to the pot. First, always use 1 tbsp olive oil sparingly—too much creates excess residue. After cooking, immediately wipe down the bottom with a damp paper towel while the pot is still warm. For stubborn stains, add ½ cup water and cook on "Sauté" for 1 minute to loosen the residue before scrubbing. I’ve found using a silicone spatula helps scrape without scratching the pot. 🔥
Undercooked Rice
Undercooked rice often happens when the liquid-to-rice ratio is off or the pressure wasn’t maintained. For white rice, stick to the 2.5:1 water-to-rice ratio and ensure the valve is sealed before starting. If using brown rice, increase cook time to 22-25 minutes and add ½ cup extra liquid. After cooking, if grains still feel firm, add 2 tbsp water, secure the lid, and cook for an additional 2-3 minutes on high pressure. Always do a natural release to avoid uneven cooking.
Mushy or Gummy Texture
Mushy rice usually results from overcooking or insufficient natural release time. First, never exceed the recommended cook times—white rice should never go beyond 8 minutes on high pressure. After cooking, always let the pressure release naturally for 10 minutes before venting. If your rice still turns out gummy, try rinsing the rice more thoroughly before cooking to remove excess starch. For a drier texture, reduce the liquid by ¼ cup next time and cook for 1 minute less.
Uneven Cooking
Uneven cooking can occur if the rice isn’t distributed evenly or if the pot isn’t level. Before cooking, stir the rice gently after adding liquid to ensure even distribution. Place your Instant Pot on a level surface to prevent liquid from pooling. If using a larger quantity than 2 cups rice, consider cooking in batches or using a 6-quart Instant Pot for better heat distribution. I’ve also found that preheating the pot on "Sauté" for 30 seconds** before adding rice helps maintain consistent temperatures.
Steam Escape
If your Instant Pot releases steam during cooking, the lid might not be sealed properly or the gasket could be worn. First, ensure the lid is locked securely—you should hear a distinct click when closing it. If the issue persists, inspect the gasket for cracks or damage. For a quick fix, run the gasket under warm water to soften it before sealing. If the gasket is old, replace it—most Instant Pot models have compatible replacement parts available online. A properly sealed lid is critical for building and maintaining pressure. ✨
Nutrition facts
Frequently asked questions
Can I use this recipe for other rice varieties besides white rice?
For brown rice, increase the water to 3 cups and cook for 22-25 minutes on high pressure. Basmati or jasmine rice works with 2.25 cups water and 8 minutes of cooking time. Always adjust liquid ratios based on package instructions for best results.
Why does my Instant Pot rice turn out mushy?
Mushy texture usually comes from overcooking or insufficient natural release time. Stick to the exact cook times and always let the pressure release naturally for 10 minutes before venting. For extra fluffiness, rinse the rice thoroughly before cooking to remove excess starch.
Can I cook rice in my 8-qt Instant Pot without the sauté step?
Yes, but you'll miss out on that nutty flavor and reduced sticking risk. If skipping sauté, add 1 tbsp butter directly to the pot with the water to help distribute heat. Just stir the rice gently after adding liquid to ensure even cooking.
How do I prevent burnt rice at the bottom?
Use 1 tbsp olive oil sparingly and wipe the pot's bottom immediately after cooking while still warm. For stubborn residue, add ½ cup water and cook on "Sauté" for 1 minute to loosen before scrubbing. Always use a silicone spatula to avoid scratching the pot.
Can I make this rice ahead of time for meal prep?
Yes! Cooked rice stays fresh in an airtight container for 4-5 days in the fridge. For longer storage, freeze portions in single-serving containers for up to 3 months. Reheat with a splash of water and cover to restore moisture—never microwave dry rice.